When you install the Bicep CLI manually, run Bicep commands directly using the bicep syntax instead of the az bicep syntax used with Azure CLI.
To check your Bicep CLI version after manual installation, run:
Windows Command Prompt
bicep --version
Alternatively, Microsoft provides instructions on how to install Azure Bicep manually for Windows, Linux, and macOS.
Visual Studio Code and Bicep Extension
To create Bicep files, you need a reliable editor. We recommend:
- Visual Studio Code: Install it here if you don’t already have it.
- Bicep extension for Visual Studio Code: This adds language support and resource autocompletion. It helps you write and validate Bicep files efficiently.
You can install the Visual Studio Code Extension by searching for Bicep in the search bar.
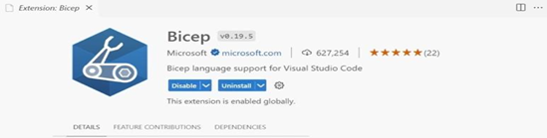
Learn how to install the Bicep extension.
Step 2: Create Azure Bicep Files
Once you’ve installed the required Azure CLI version or PowerShell module, the Visual Studio Code and the Bicep Extension, you can start creating your Azure Bicep files.
Add resource snippet
Visual Studio Code with the Bicep extension IntelliSense (predefined snippets) make development easier. We start by adding a snippet to create a virtual network (VNET).
- Open Visual Studio Code
- Create a new file named main.bicep
- In main.bicep, type in vnet, select res-vnet from the available options and press either TAB or ENTER.
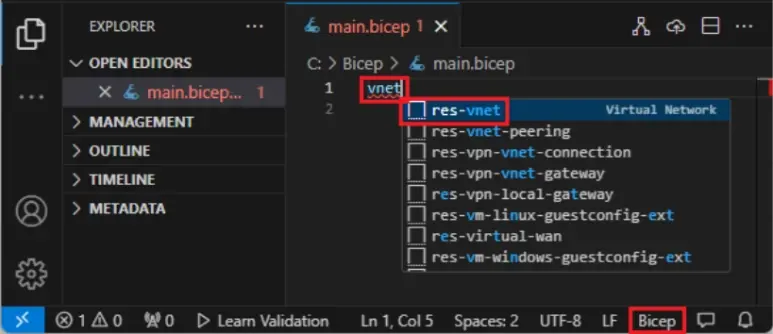
Your Bicep file should now look like this:
resource virtualNetwork 'Microsoft.Network/virtualNetworks@2019-11-01' = {
  name: 'name'
  location: location
  properties: {
    addressSpace: {
      addressPrefixes: [
        '10.0.0.0/16'
      ]
    }
    subnets: [
      {
        name: 'Subnet-1'
        properties: {
          addressPrefix: '10.0.0.0/24'
        }
      }
      {
        name: 'Subnet-2'
        properties: {
          addressPrefix: '10.0.1.0/24'
        }
   }
    ]
  }
}
You’ll see that your Bicep file contains two underlines:
- Yellow underline: a warning that the API version is outdated.
- Red underline: an error, as a required parameter is missing.
This is because the Bicep linter checks for syntax and best practice violations. If you hover over @2019-11-01, a popup suggests: Use more recent API version for 'Microsoft.Network/virtualNetworks'. Select Quick fix, then replace with the latest version.
This updates to the latest API version.
Add parameter
The code snippet from the last section is missing a required parameter: location. This is why you see a red underline. To fix it, add the following line at the top of your file:
Bicep
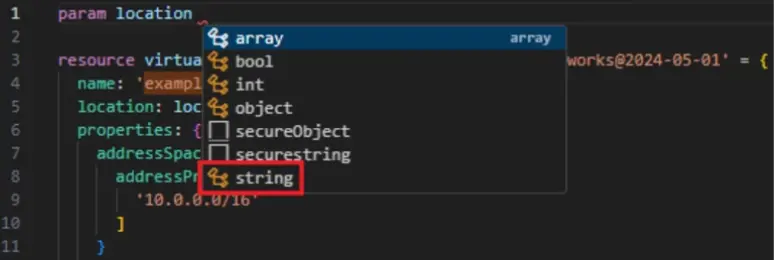
param location
When you type a space after location, IntelliSense will suggest available data types. Choose string. See image below:
Then, set this default value:
Bicep
param location string = resourceGroup().location
This sets the location of the virtual network to match the resource group's location.
Next, add another parameter at the top of the file for the storage account name. You'll use this later:
Bicep
param storageAccountName string = 'store${uniqueString(resourceGroup().id)}'
The storageAccountName parameter works, but storage accounts have strict naming rules. The name must be between 3 and 24 characters long. You can enforce this by adding decorators to the parameter.
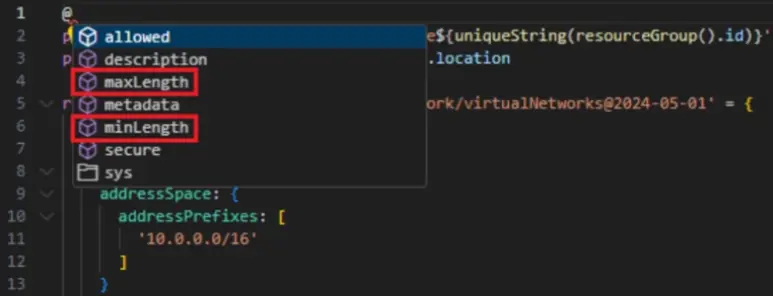
Above the parameter, type @ to view available decorators. Use @minLength and @maxLength to set the limits:
Bicep
@minLength(3)
@maxLength(24)
param storageAccountName string = 'store${uniqueString(resourceGroup().id)}'
You can also add a description to explain the naming rules, which is helpful for others to understand the Bicep file:
Bicep
@minLength(3)
@maxLength(24)
@description('Provide a name for the storage account. Use only lowercase letters and numbers. The name must be unique across Azure.')
param storageAccountName string = 'store${uniqueString(resourceGroup().id)}'
These parameters are now ready for use in your deployment.
Add resource
Instead of using a snippet to define the storage account, you can use IntelliSense to fill in the values, which is way faster and reduces manual typing.
To define the resource, use the resource keyword. Type this below your virtual network definition:
Bicep
resource storageAccount
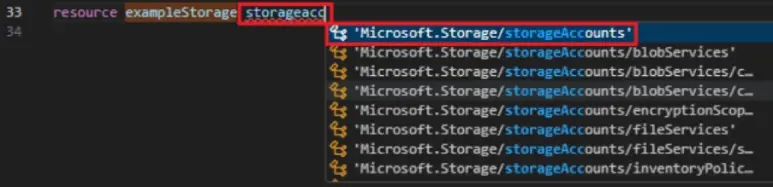
After choosing Microsoft.Storage/storageAccounts, IntelliSense will list the available API versions. Again, select the most recent one.
After selecting the resource type, add = and a space.
IntelliSense will show options for what you can add next.
Choose required-properties.

This inserts all the minimum properties needed to deploy the storage account.
After selecting it, your resource will contain the following properties:
Bicep
resource storageAccount 'Microsoft.Storage/storageAccounts@2023-05-01' = {
  name:
  location:
  sku: {
    name:
  }
  kind:
}
All that’s left is providing values for the properties (use IntelliSense for this) which will result in this:
Bicep
resource storageAccount 'Microsoft.Storage/storageAccounts@2023-05-01' = {
  name: storageAccountName
  location: location
  sku: {
name: 'Standard_LRS'
}
  kind: 'StorageV2'
}
In the end, your code should look like this:
Bicep
@minLength(3)
@maxLength(24)
@description('Provide a name for the storage account. Use only lowercase letters and numbers. The name must be unique across Azure.')
param storageAccountName string = 'store${uniqueString(resourceGroup().id)}'
param location string = resourceGroup().location

resource virtualNetwork 'Microsoft.Network/virtualNetworks@2024-05-01' = {
  name: 'exampleVNet'
  location: location
  properties: {
    addressSpace: {
      addressPrefixes: [
        '10.0.0.0/16'
      ]
    }
    subnets: [
      {
        name: 'Subnet-1'
        properties: {
          addressPrefix: '10.0.0.0/24'
        }
      }
      {
        name: 'Subnet-2'
        properties: {
          addressPrefix: '10.0.1.0/24'
        }
      }
    ]
  }
}

resource storageAccount 'Microsoft.Storage/storageAccounts@2023-05-01' = {
  name: storageAccountName
  location: location
  sku: {
    name: 'Standard_LRS'
  }
  kind: 'StorageV2'
}
And that’s all.
You’ve now learned how to define parameters and deploy a VNET and storage account using Azure Bicep.