Now, let’s muster up some effort and start from scratch, where we’ll manually configure it.
Estimate workload cost with Azure Pricing Calculator
This tutorial will show you how to estimate costs using the Azure Pricing Calculator.
For this example, we’ll use one of the most common things you use in compute: Virtual Machines (VMs). We estimate the cost of a Windows VM and add an application gateway.
But bear in mind: this is just a general example, so replace it with your business's actual requirements when creating your own estimate.
For now, follow along; we promise it won’t be hard.
Step 1. Open the Azure Pricing Calculator page.
Step 2. Look for the products tab and open Virtual Machines (VMs).
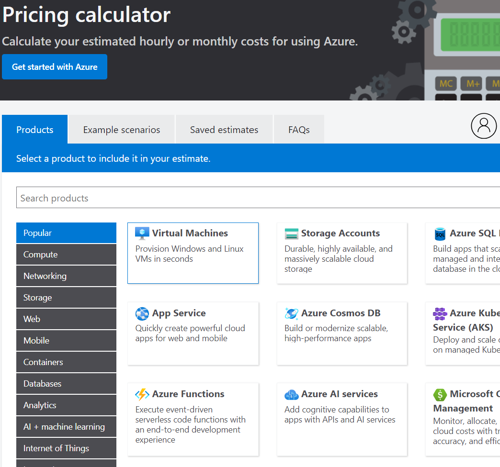
Then, you’ll see the following popup in your screen in the right corner;

Next, go to the Saved Estimates tab to change the name.
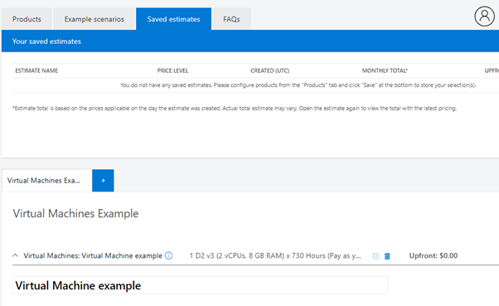
Step 3. Configure the Virtual Machine (VM) settings to match your preferred specifications
We should define the metrics in the cost estimator to match the specific use case.
Let’s say you’re based in the south of the UK. Then, you would want to match the region as close as possible to you.
But be careful: make sure to select the correct region, as it affects price and availability. Different regions have different costs, and some may not support specific services or capacities.
When you choose a region that is not aligned with your location, such as outside the country you’re in, you might find that the resource isn’t even available there.
So, for this example, we will pick UK South as this is the region we need.
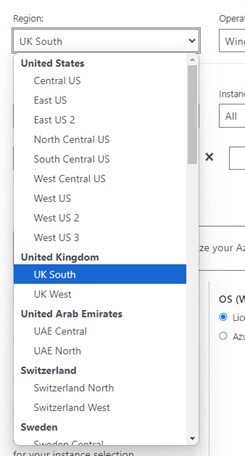
So, for this example, we want these specifications:
| Settings |
Value |
| Region |
UK South |
| Operating System (OS) |
Windows |
| Type |
OS only |
| Tier |
Standard |
| Category and Series |
All |
| Instance |
A3 instance with 4 cores and 7 GB RAM |
Note: the above specifications are just used for this general example.
Once you have set the metrics like in the example, it should look like this:
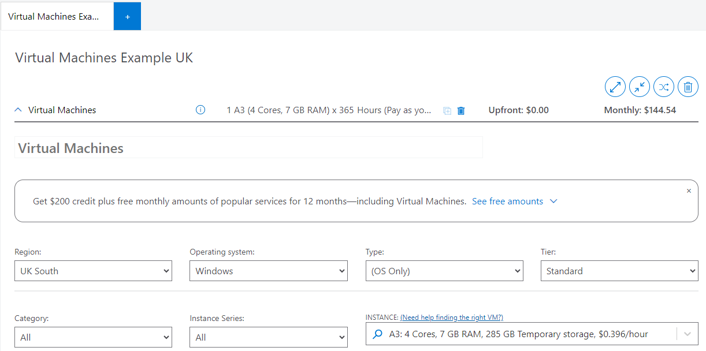
It’s utterly important to know that the instance series determines the scale and size of your cluster nodes, directly impacting performance and cost. In this specific example, we left it to all and opted for an A3 instance with 4 cores and 7 GB RAM.
The A series VM sizes suit entry-level workloads like development, testing, small databases, and low-traffic web servers.
If you’re new to Azure or just getting started, it may be hard to understand which VM size and series type you need. The most fitting VM size always depends on your requirements (think about CPU, memory, storage, network bandwidth, etc.). Learn more about VM sizes in Azure.
Step 4. Set usage hours
Next, you should define the number of hours this particular VM will be up for. It is set from standard to 100% since Azure takes 730 hours for one month.
However, in this specific example, we want it to be 50% available, so we set the hours-per-month value to 365.

Step 5. Choose licencing and payment option
As you scroll down, you see the different payment options. For this particular example, we choose pay-as-you-go, which uses on-demand market pricing. We also choose to include OS licences.
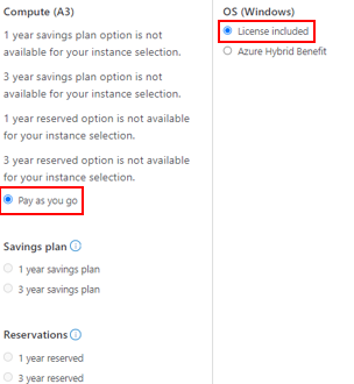
As visible above, you can also choose to use Azure’s discounts, such as Azure Savings Plans or Azure Reservations.
For example, Reserved Instances can save you up to 72% over pay-as-you-go prices if you sign up for a one- or three-year term.
Azure also has flexible pricing models that let you scale resources up or down based on demand, so you only pay for what you use.
Step 6. Configure storage
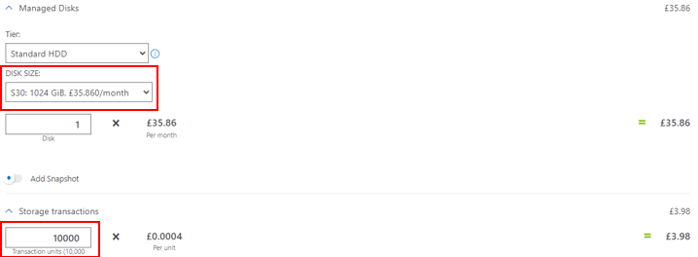
We stick with the standard HDD for managed disks, but we chose S30s and will have one of those. For storage transactions, we will set the value to 10,000 a month.
Step 7. Set bandwidth and data transfer
For the bandwidth, we select the "Inter-region" option, so data can move from “South UK to West UK.” The outbound data transfer will be 50 GB.

Step 8. Add Application Gateway
The next thing we're going to add is an application gateway. Reaccess the Azure Pricing Calculator at azure.microsoft.com. You can find it in two ways.
- First way is to go to the networking menu and click on the Application Gateway option.
- Secondly, and the easiest way, is to search for it. Just type in “Application” and you should get these options.
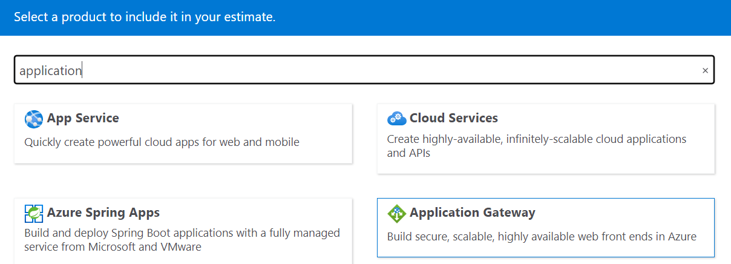
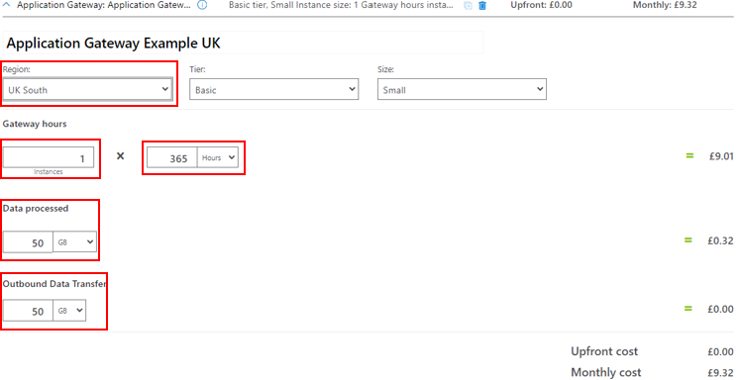
Then, click on the application gateway and just wait for the message dialogue to open and click on view. So, we can create it again for the same region (south UK) as our VM.
We’ll leave it with the basic tier and keep the size small. Then, we change instances to 1. Again, just like in the virtual machine, we want 50 percentage less availability (half the month). So, this translates to 365 hours.
We're going to process 50 gigabytes of data, and we're going to have 50 gigabytes of outbound data transfer as well.
In the end, it should look like this:
Review the outcomes
When you scroll down, you can see the total estimated upfront costs (which we don’t have as we selected pay-as-you-go) and the estimated monthly costs for this particular example with a VM in South UK and an Application Gateway.

As you can see in the image above, you can choose different types of support and upgrade it depending on your needs. The level of support you choose (Basic, Developer, Standard, Professional Direct) directly impacts costs, with higher levels offering faster and more comprehensive service at a higher price.
Now, the licensing agreement you select (Microsoft Customer Agreement, Enterprise Agreement, New Commerce CSP, Microsoft Online Services Agreement) also influences your final costs based on the scale of your commitment and the discounts provided, with larger commitments generally offering more substantial savings.
- You can also change the currency; for this example, we used British Pounds.
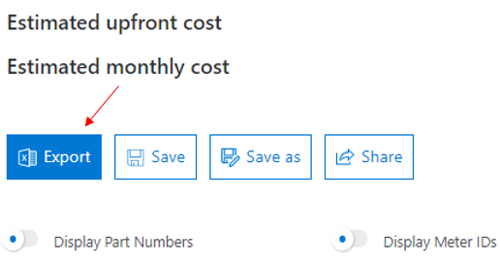
- You can also export the file to Excel so you can have it offline.


