How to create NSGs in Azure?
Creating NSGs in Azure is not rocket-science. Let’s show you how to create NSGs in the Azure Portal, step-by-step.
1. First, head to the Azure Portal and search NSG and open it.
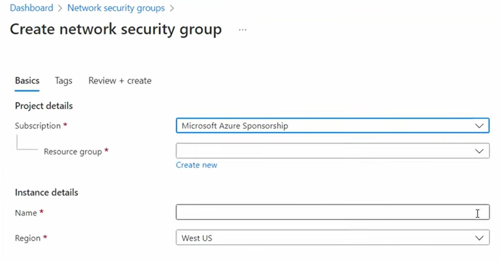
2. Click on create:
3. Select your resource group, and provide a name and pick your region:
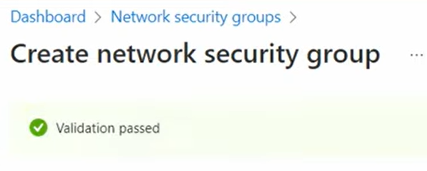
4. You should see the following:
5. Then, click on create and you should see the following:
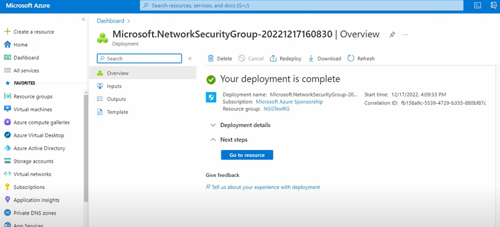
And that’s all. You’ve now created a NSG in Azure through the portal.
To see all your NSGs, search for Network security group and you should find your NSGs:
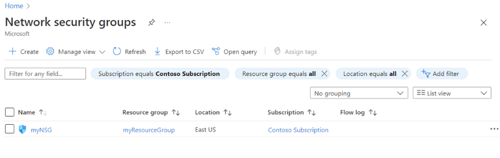
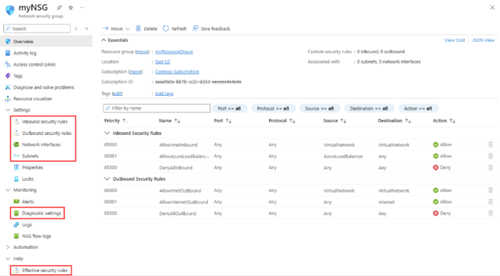
You can see the details of the NSG:
Next, assign a subnet to link with this NSG. On the left-hand menu, click Subnets.
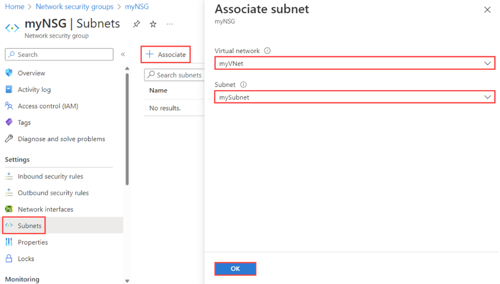
To associate the NSG, click + Associate, then choose your virtual network and the specific subnet. Click OK to complete the association.
Create and Configure NSG Rules
The default rules allow:
- Inbound traffic from Vnets and Azure load balancers, while blocking all other incoming traffic.
- Default outbound rules allow access to other virtual networks and the internet but deny everything else.
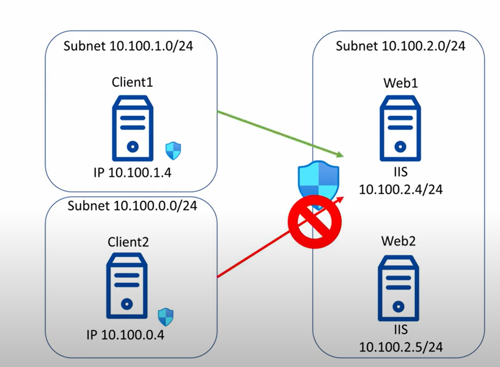
For many scenarios, this setup is too permissive. We need more control over who can access the web VMs, which is why we’ll allow web traffic from the client VNet but block all other incoming web traffic.
To do this, we must modify the inbound rules for this example:
Create new rules to allow inbound web traffic on ports 80 and 443:
- Go to Inbound Security Rules and click Add a Rule.
- Select a Source IP address, either a single IP or a block of IPs. Add the block assigned to your client subnet.
- Leave Source Port Range as any. Leave Destination as any.
- Set Service to HTTP, which automatically selects Destination Port Range 80.
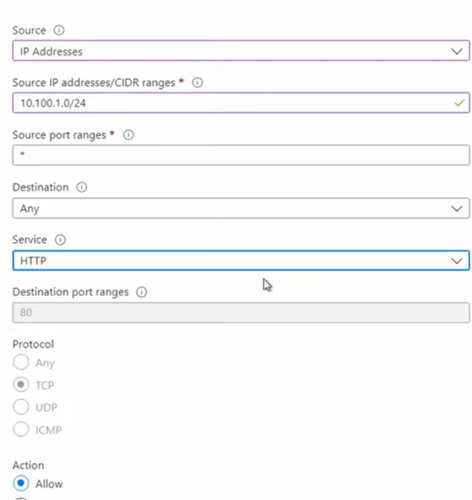
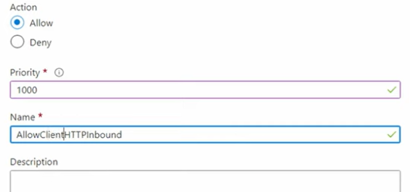
- Keep Action as Allow and change the Priority to 1000. Priorities can range from 100 to 4096. Leave gaps to insert future rules if needed.
- We can name the rule Allow Client HTTP Inbound, add a description (optional), and click Add.
Repeat the same process for HTTPS (Port 443) with a slightly higher priority, e.g., 1010.
Until now, we haven’t accomplished anything yet. Technically, traffic to ports 80 and 443 from our subnet is already allowed by rule 65000, which permits all ports and protocols between v-nets.
Hence, we now need blocking rules:
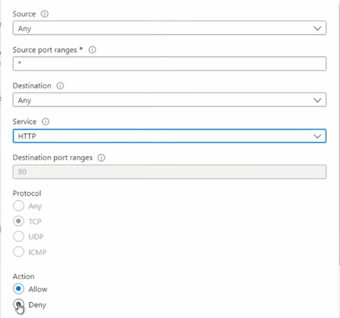
- Add a new rule.
- Set source and destination to Any.
- Select service as HTTP, action as Deny, and keep the priority below your allow rules.
- Add another rule for HTTPS traffic with the same settings.
Rules are processed top to bottom and stop when matched. This setup allows web traffic from the client subnet while blocking all other traffic. Without the deny rules, default rules would allow traffic from any VNet.
This example shows how to prioritise NSG rules to allow and block traffic effectively
Check out Microsoft’s documentation for creating NSGs in Azure for more.